# Send WhatsApp Campaigns and Track Revenue in Robylon
Send an approved WhatsApp template to an audience segment, track delivery, reads and replies, and attribute Shopify orders and revenue to each campaign.
> Source: https://www.robylon.ai/docs/whatsapp/campaigns
> Section: Outbound
A campaign sends one approved WhatsApp template to many customers at once, such as an order update to everyone affected by a delay, or an offer to customers who opted in to marketing. Robylon tracks each campaign's delivery, reads, replies, cost and, with Shopify connected, the revenue it brought in.
Open campaigns from **Outbound → Campaigns** in the left navigation. Audiences are under **Outbound → Audiences**.
## What does the campaigns page show?
The top of the page totals all campaigns:
- **Revenue:** order value attributed to campaigns, and the number of attributed orders.
- **Cost:** what the messages cost.
- **ROI:** revenue divided by total cost.
- **Messages Sent:** with how many were delivered and read.
Below it, each campaign shows its **Start Date**, **Audience** size, **Revenue**, **Cost**, **ROI**, and **Sent**, **Delivered**, **Read** and **Replied**. Filter the list by **Channel** and **Status**.
## How do I send a campaign?
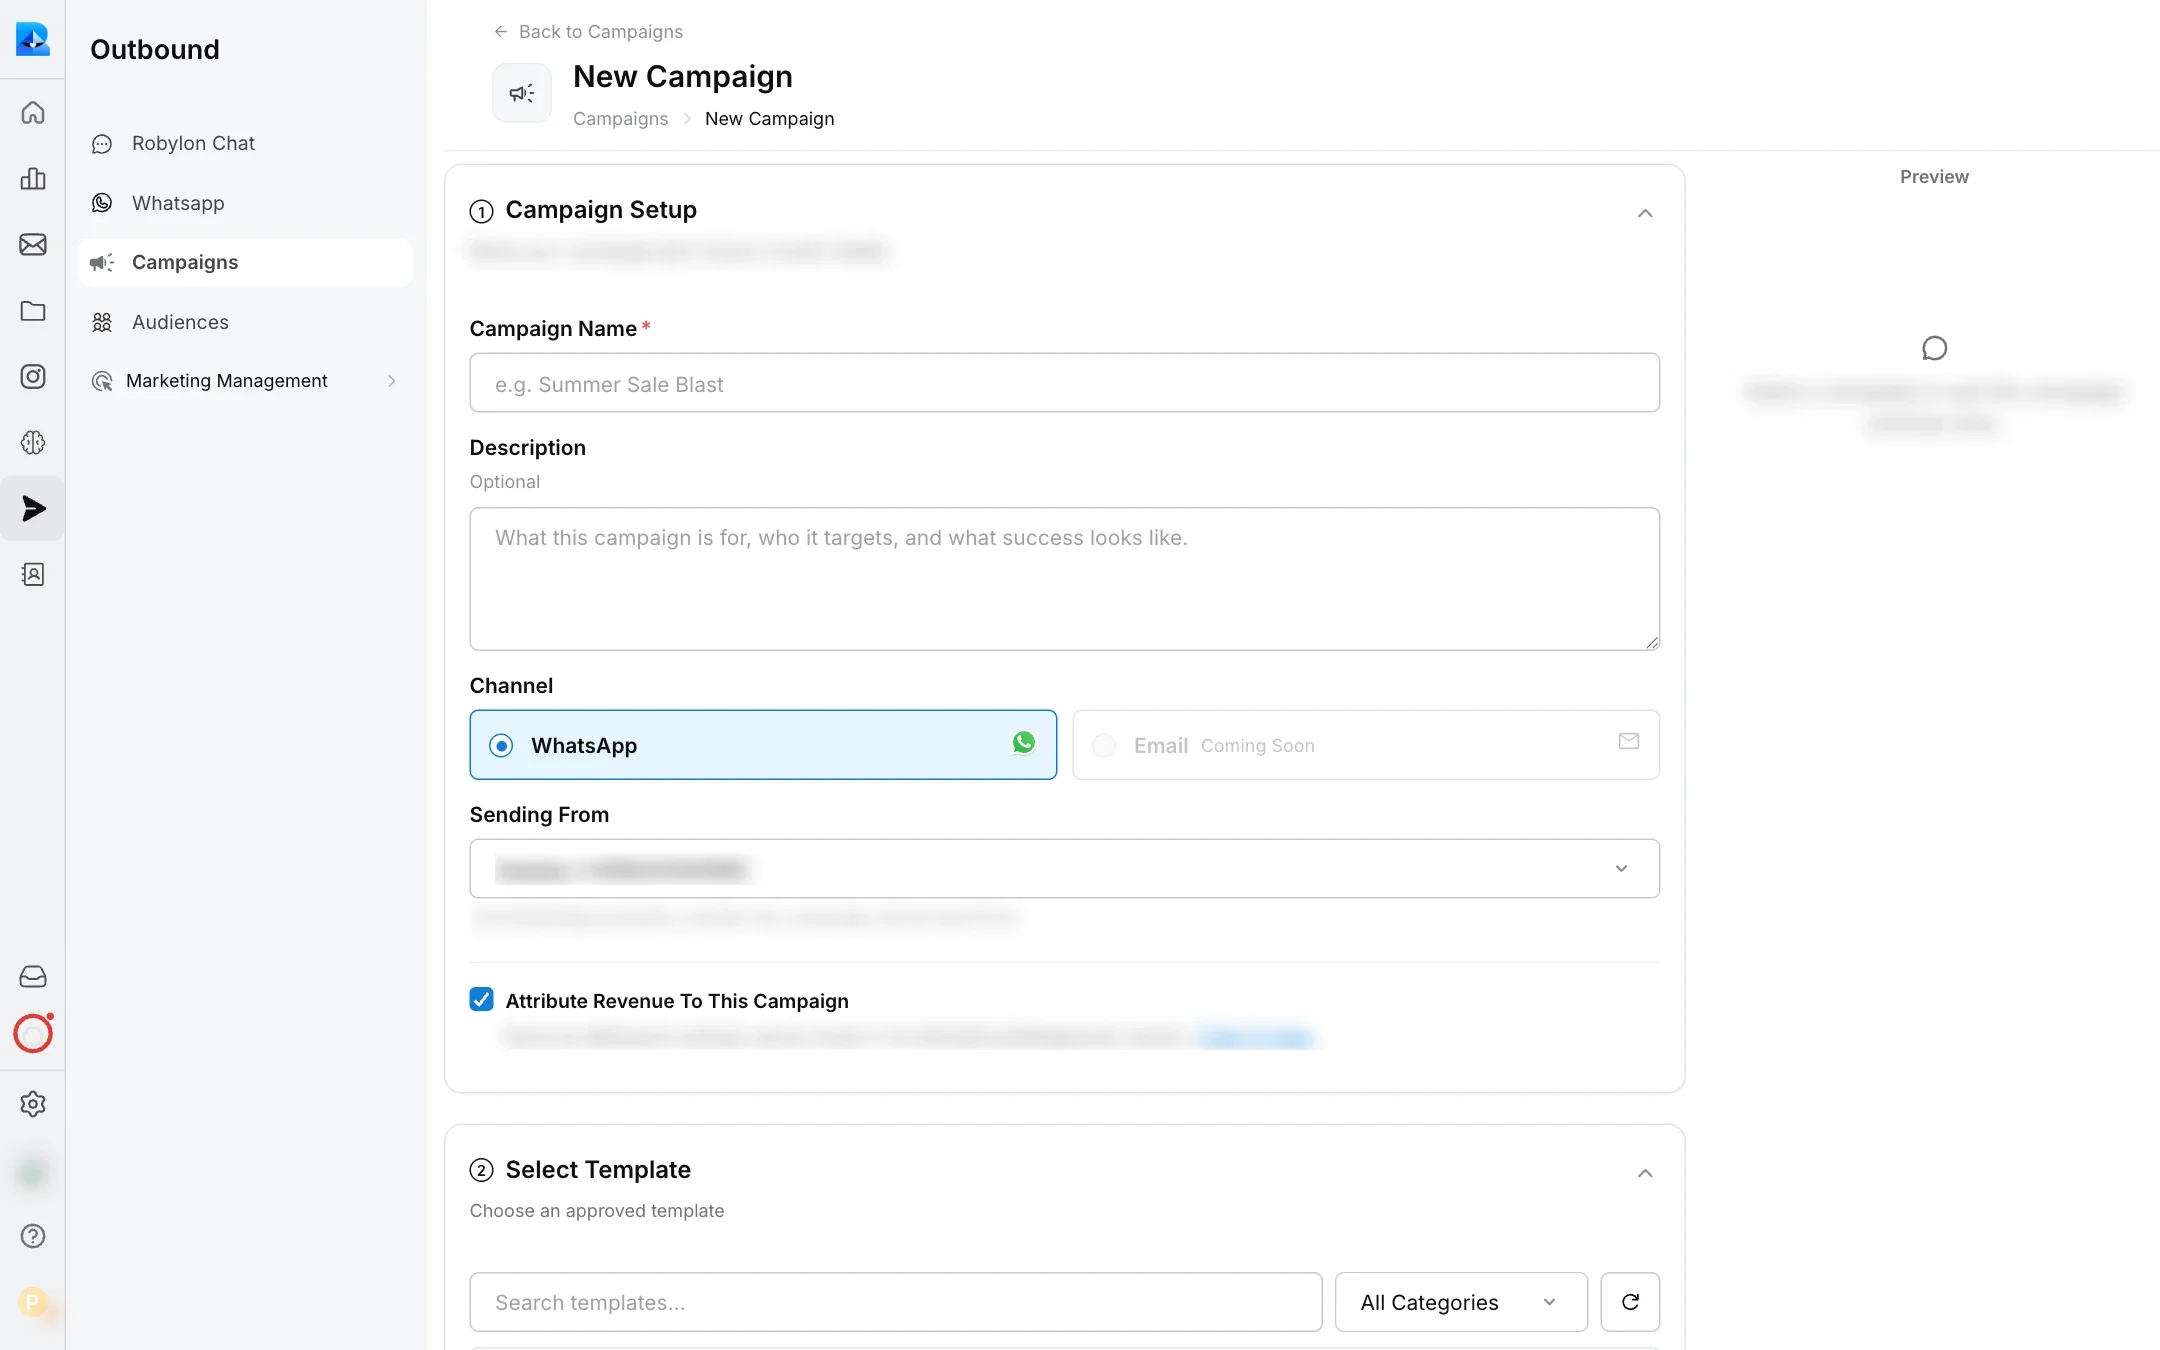
In **Outbound → Campaigns**, click **New Campaign**.
Enter a **Campaign Name** and an optional **Description**. Choose the **Channel** (**WhatsApp**; Email is coming soon) and the WhatsApp number to send from in **Sending From**. Leave **Attribute Revenue To This Campaign** on to count orders it drives.
Choose an approved template. Filter by category if you have many. If the template has a backup, it is used automatically when the main template is rated Red, paused or disabled. Backups are set on the template's page. See [WhatsApp templates](https://www.robylon.ai/docs/whatsapp/templates#what-is-a-backup-template).
Choose **All marketing-opted customers** or one of your saved audience segments.
Under **Map Variables**, choose the audience field that holds the **Recipient Phone Number**, then map each template variable to a data field so every message is personalised. If the template has a backup, map the backup's variables too: map all of them, or leave them all empty. With the backup left empty, the campaign does not fall back to it.
If the template has link buttons, turn on **UTM Tracking**. **UTM Source** and **UTM Medium** come from your WhatsApp outbound configuration and cannot be edited here. Enter a **UTM Campaign** name that is not already in use. The **Link Preview** shows the final link. UTM tags let you trace orders back to the campaign in your analytics.
Under **Schedule & Delivery**, set **When To Send**: **Send Immediately** or **Schedule For Later** with a date and time. Set the **Sending Speed**: **Full Speed** sends as fast as your messaging tier allows, and **Gradual** limits sending to a **Rate Per Hour** (500, 1000, 2000 or 5000). Turn on **Sending Hours** to send only within set hours on each day of the week.
Use **Send A Test Message** to send the template to a phone number with example values. When it looks right, click **Launch**, or **Schedule** if you chose a later time.
 WhatsApp limits how many customers you can message first each day. Check your number's **Messaging Limit** before a large send. See [Connect WhatsApp](https://www.robylon.ai/docs/whatsapp/connect#what-is-the-messaging-limit).
## How do I build an audience?
An audience, or segment, is a reusable list of customers to send campaigns to. Build it from your Shopify store data or a CSV upload.
In **Outbound → Audiences**, click **New Segment**.
Enter a **Name** and an optional **Description**.
Under **Audience Source**, pick a **Source type**. For **External database**, choose **Shopify** as the **Database**, then the store **Account**; customers come from that store. For **CSV**, upload a file of contacts; the form links to a sample CSV that shows the format.
For a Shopify source, add rules to narrow the list, grouped with AND and OR logic (up to 2 groups). Click **Match Audience** to see the **Estimated Audience**, the number of customers who match.
Click **Save Segment**. It appears in the list with its source, number of contacts, the campaigns that used it, and when it was last matched.
## What should a CSV audience file contain?
- A `phone_number` column is required. Include the country code, such as `+919876543210`. Spaces, dashes and brackets are removed, and a `+` is added if missing.
- `name` and `email` columns are optional.
- Any other columns are kept, so you can use them to fill template variables in a campaign.
Rows with a phone number that is not valid are skipped. If no row is valid, the upload is rejected.
## How is revenue attributed to a campaign?
Leave **Attribute Revenue To This Campaign** on in the campaign setup to credit Shopify orders to it, or turn it off to leave the campaign out of revenue reporting.
To set the lookback period and the engagement that counts, see [Revenue attribution](https://www.robylon.ai/docs/outbound/revenue-attribution).
WhatsApp limits how many customers you can message first each day. Check your number's **Messaging Limit** before a large send. See [Connect WhatsApp](https://www.robylon.ai/docs/whatsapp/connect#what-is-the-messaging-limit).
## How do I build an audience?
An audience, or segment, is a reusable list of customers to send campaigns to. Build it from your Shopify store data or a CSV upload.
In **Outbound → Audiences**, click **New Segment**.
Enter a **Name** and an optional **Description**.
Under **Audience Source**, pick a **Source type**. For **External database**, choose **Shopify** as the **Database**, then the store **Account**; customers come from that store. For **CSV**, upload a file of contacts; the form links to a sample CSV that shows the format.
For a Shopify source, add rules to narrow the list, grouped with AND and OR logic (up to 2 groups). Click **Match Audience** to see the **Estimated Audience**, the number of customers who match.
Click **Save Segment**. It appears in the list with its source, number of contacts, the campaigns that used it, and when it was last matched.
## What should a CSV audience file contain?
- A `phone_number` column is required. Include the country code, such as `+919876543210`. Spaces, dashes and brackets are removed, and a `+` is added if missing.
- `name` and `email` columns are optional.
- Any other columns are kept, so you can use them to fill template variables in a campaign.
Rows with a phone number that is not valid are skipped. If no row is valid, the upload is rejected.
## How is revenue attributed to a campaign?
Leave **Attribute Revenue To This Campaign** on in the campaign setup to credit Shopify orders to it, or turn it off to leave the campaign out of revenue reporting.
To set the lookback period and the engagement that counts, see [Revenue attribution](https://www.robylon.ai/docs/outbound/revenue-attribution).