# Quick Start: Set Up Robylon Step by Step
Follow the setup checklist on the Robylon Home page: add your account details, set up the chatbot, build your Knowledge Base and install the chatbot on your site.
> Source: https://www.robylon.ai/docs/quick-start
> Section: Get started
The **Home** page in the Robylon dashboard has a setup checklist that takes a new workspace from empty to live. Work through it in order, and each step links to the guide that explains it in detail.
Open it from **Home** at the top of the left sidebar.
## What does the setup checklist cover?
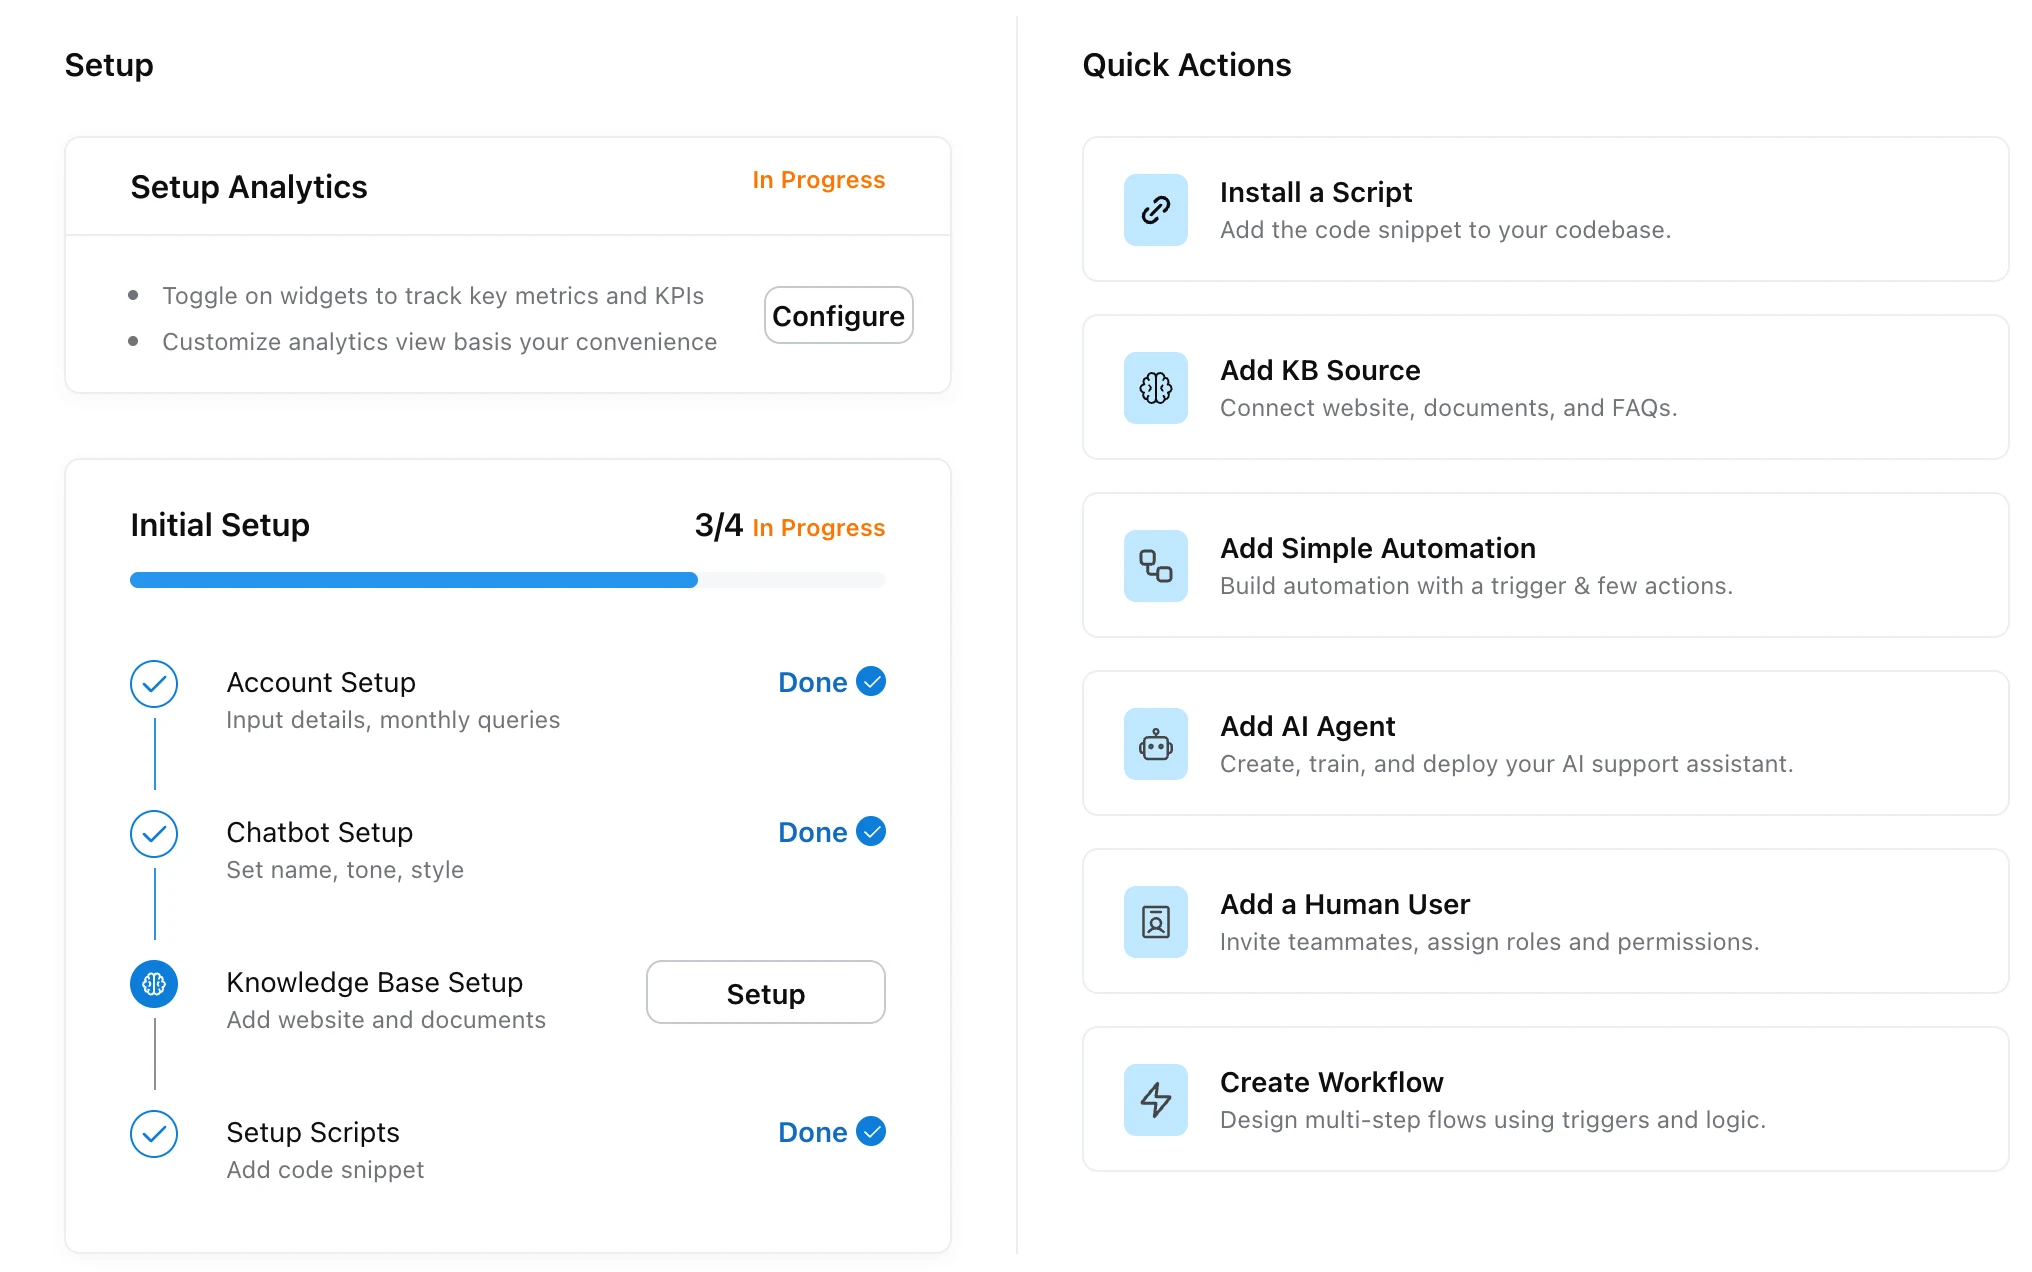
The **Initial Setup** card lists four steps and marks each one **Done** as you finish it:
Add your company details. See [Brand info and timezone](https://www.robylon.ai/docs/brand-info) and [Languages](https://www.robylon.ai/docs/languages).
Set your chatbot's name, icon and style. See [Widget and behaviour](https://www.robylon.ai/docs/channels-connectors/chatbot-settings) and [Appearance](https://www.robylon.ai/docs/customize-your-robylon-bot).
Add your website and documents so the AI agent can answer from them. See [Add sources](https://www.robylon.ai/docs/knowledgebase).
Add the chatbot's code snippet to your website. See [Install the chatbot](https://www.robylon.ai/docs/chatbot/installation).
The **Setup Analytics** card lets you choose which widgets to track on the Analytics dashboard. See [Analytics dashboard](https://www.robylon.ai/docs/analytics).
 ## What can I do from the Quick Actions?
The **Quick Actions** on the Home page jump straight to the most common tasks:
| Quick action | What it does | Guide |
| --- | --- | --- |
| **Install a Script** | Add the chatbot's code snippet to your site. | [Install the chatbot](https://www.robylon.ai/docs/chatbot/installation) |
| **Add KB Source** | Connect a website, documents or FAQs. | [Add sources](https://www.robylon.ai/docs/knowledgebase) |
| **Add Simple Automation** | Build an automation with a trigger and a few actions. | [Simple automations](https://www.robylon.ai/docs/simple-automations) |
| **Add AI Agent** | Create, train and deploy an AI support assistant. | [Custom agents](https://www.robylon.ai/docs/ai-agents/custom-ai-agents) |
| **Add a Human User** | Invite teammates, assign roles and permissions. | [Teammates and seat types](https://www.robylon.ai/docs/human-users/add-human-users) |
| **Create Workflow** | Design multi-step flows using triggers and logic. | [Workflows](https://www.robylon.ai/docs/product/product) |
## What should I do after the checklist?
Connect the other channels your customers use, then bring in your team:
* **Channels:** [email](https://www.robylon.ai/docs/channels/email), [WhatsApp](https://www.robylon.ai/docs/whatsapp/connect), [voice](https://www.robylon.ai/docs/channels-connectors/voice-settings) and [social](https://www.robylon.ai/docs/channels/social).
* **Your team:** [add teammates](https://www.robylon.ai/docs/human-users/add-human-users), set up [groups](https://www.robylon.ai/docs/human-users/groups) and [assignment](https://www.robylon.ai/docs/human-users/assignment).
* **Test before going live:** use [bulk testing](https://www.robylon.ai/docs/knowledgebase/bulk-testing) to check answers against real customer questions.
## What can I do from the Quick Actions?
The **Quick Actions** on the Home page jump straight to the most common tasks:
| Quick action | What it does | Guide |
| --- | --- | --- |
| **Install a Script** | Add the chatbot's code snippet to your site. | [Install the chatbot](https://www.robylon.ai/docs/chatbot/installation) |
| **Add KB Source** | Connect a website, documents or FAQs. | [Add sources](https://www.robylon.ai/docs/knowledgebase) |
| **Add Simple Automation** | Build an automation with a trigger and a few actions. | [Simple automations](https://www.robylon.ai/docs/simple-automations) |
| **Add AI Agent** | Create, train and deploy an AI support assistant. | [Custom agents](https://www.robylon.ai/docs/ai-agents/custom-ai-agents) |
| **Add a Human User** | Invite teammates, assign roles and permissions. | [Teammates and seat types](https://www.robylon.ai/docs/human-users/add-human-users) |
| **Create Workflow** | Design multi-step flows using triggers and logic. | [Workflows](https://www.robylon.ai/docs/product/product) |
## What should I do after the checklist?
Connect the other channels your customers use, then bring in your team:
* **Channels:** [email](https://www.robylon.ai/docs/channels/email), [WhatsApp](https://www.robylon.ai/docs/whatsapp/connect), [voice](https://www.robylon.ai/docs/channels-connectors/voice-settings) and [social](https://www.robylon.ai/docs/channels/social).
* **Your team:** [add teammates](https://www.robylon.ai/docs/human-users/add-human-users), set up [groups](https://www.robylon.ai/docs/human-users/groups) and [assignment](https://www.robylon.ai/docs/human-users/assignment).
* **Test before going live:** use [bulk testing](https://www.robylon.ai/docs/knowledgebase/bulk-testing) to check answers against real customer questions.