# Customize the Inbox Details Panel in Robylon
Choose which sections and fields agents see in the inbox's right-hand panel for chat, voice, email and review conversations, and in which order.
> Source: https://www.robylon.ai/docs/inbox/inbox-panel
> Section: Inbox and tickets
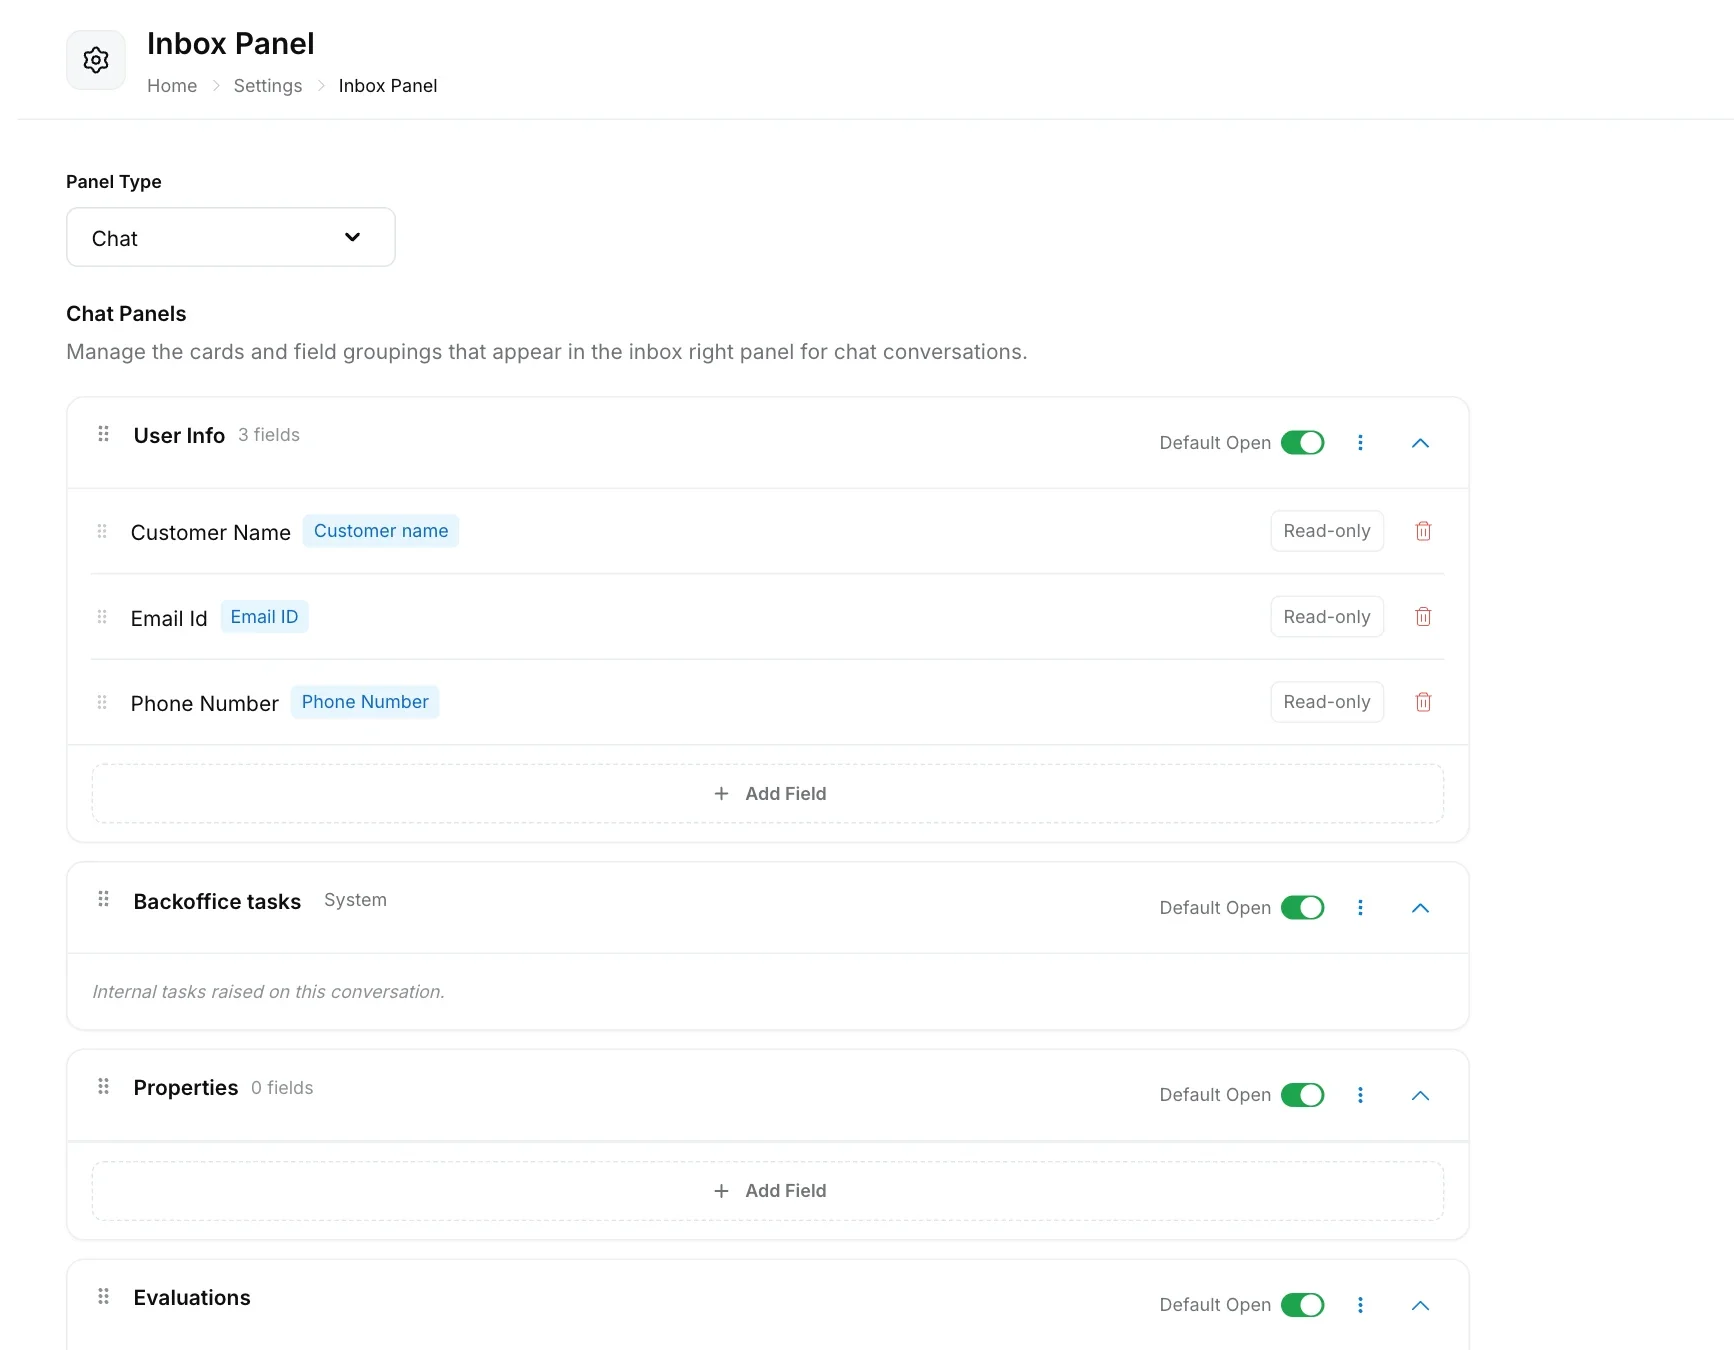
The inbox panel is the right-hand side of a conversation in the inbox, where agents see who the customer is and the details they need to help. You decide which sections appear, which fields they contain, their order and whether they start open.
Open it from **Settings → Inbox & Productivity → Inbox Panel**.
## How do I choose which panel to edit?
Pick a **Panel Type** at the top of the page: **Chat**, **Voice**, **Email** or **Reviews**. Each conversation type has its own layout, so an email agent can see different details from a chat agent.
## What sections can the panel show?
A panel is a list of sections. Some you fill with fields; others are built in and show information automatically.
| Section | What it shows |
| --- | --- |
| User Info | Customer name, email ID and phone number. You can add fields. |
| Backoffice tasks | Internal back-office tickets raised on the conversation. Built in. |
| Properties | The [properties](https://www.robylon.ai/docs/inbox/properties) you choose, which agents can view and edit. |
| Shopify | Customer, order and payment details from a connected Shopify store, with actions such as editing or cancelling an order and issuing a refund. See [Shopify](https://www.robylon.ai/docs/integrations/shopify). |
| Evaluations | Evaluation results, once quality checks have run. Built in. |
| Tags | The conversation's [tags](https://www.robylon.ai/docs/inbox/tags), managed inline by agents. |
| Intent Classification | The conversation's intents, managed inline by agents. |
| Media | Attachments shared in the conversation. |
| Variables | Workflow variables you choose to show. |
| Orders | Order fields you choose to show. |
| Actions | [Macros](https://www.robylon.ai/docs/inbox/macros#how-do-i-add-a-macro-to-the-right-panel) as buttons agents run in one click. Add them with **Add Action Group**. Not on the Voice panel. |
## How do I change a section?
* **Add a field:** click **Add Field** in the section, enter a **Field name** and pick its **Source**.
* **Remove a field:** click the bin icon on its row.
* **Reorder:** drag sections or fields by the handle on the left.
* **Open or collapsed:** use the **Default Open** switch to decide whether the section starts expanded.
* **More options:** use the three-dot menu on the section.
Click **Save** at the bottom when you are done, or **Reset to Default** to go back to the standard layout.
Fields can come from properties, user attributes and variables. Agents can edit properties and variables in the panel, but not user attributes.
## How do I add a section?
Click **Add Section**, give it a **Section name**, choose whether it should **Start collapsed for agents**, and click **Add**. Then add fields to it.
Put what agents check on every conversation (order number, customer tier) in the first open section, and collapse the rest. Agents scroll less and answer faster.
Properties marked **To close** for a channel always show in that channel's panel, even if you remove them here.