# Tools: Let AI Agents Take Actions
Turn your APIs, forms and connected apps into tools your AI agents can call, and control how their inputs are filled.
> Source: https://www.robylon.ai/docs/data-and-integrations/api-tools-functions
> Section: Data and tools
Tools let an AI agent do things, not just talk: look up an order, update a ticket, add a row to a sheet. An agent decides when to call a tool from the tool's description, fills in the inputs from the conversation, and uses the result in its reply.
A tool wraps an [API](https://www.robylon.ai/docs/data-and-integrations/apis), a [form](https://www.robylon.ai/docs/chatbot/forms), a connector action or a workflow step, and tells the agent when to use it.
Open them from [**Settings → Data & Developer → Tools**](https://app.robylon.ai/settings/tools).
## What a tool is
A tool is an action an AI agent can decide to take. Each tool has:
| Field | What it is for |
| --- | --- |
| Tool Name | A clear name, for example `get_order_status`. |
| LLM Description | When the agent should use the tool, written for the AI. This is the most important field: the agent decides whether to call the tool from this description. |
| Tool Inputs | The values the tool needs, each with a description. The agent fills them from the conversation, or you set them to a fixed value or a variable. |
| Capture Response | Fields from the response to save into variables, each with a **Path**, for example `response.username`, and a **Save to Variable**. |
| Tool Timeout in seconds | How long to wait for a response before treating the call as failed, from 2 to 120 seconds. |
| Retry & Timeout | Whether to retry failed requests automatically, and how. See [how retries work](https://www.robylon.ai/docs/data-and-integrations/apis#how-retries-work). |
A good LLM description says when to use the tool and when not to: "Use this when the customer asks where their order is and you have an order ID. Do not use it for returns."
## Create a tool
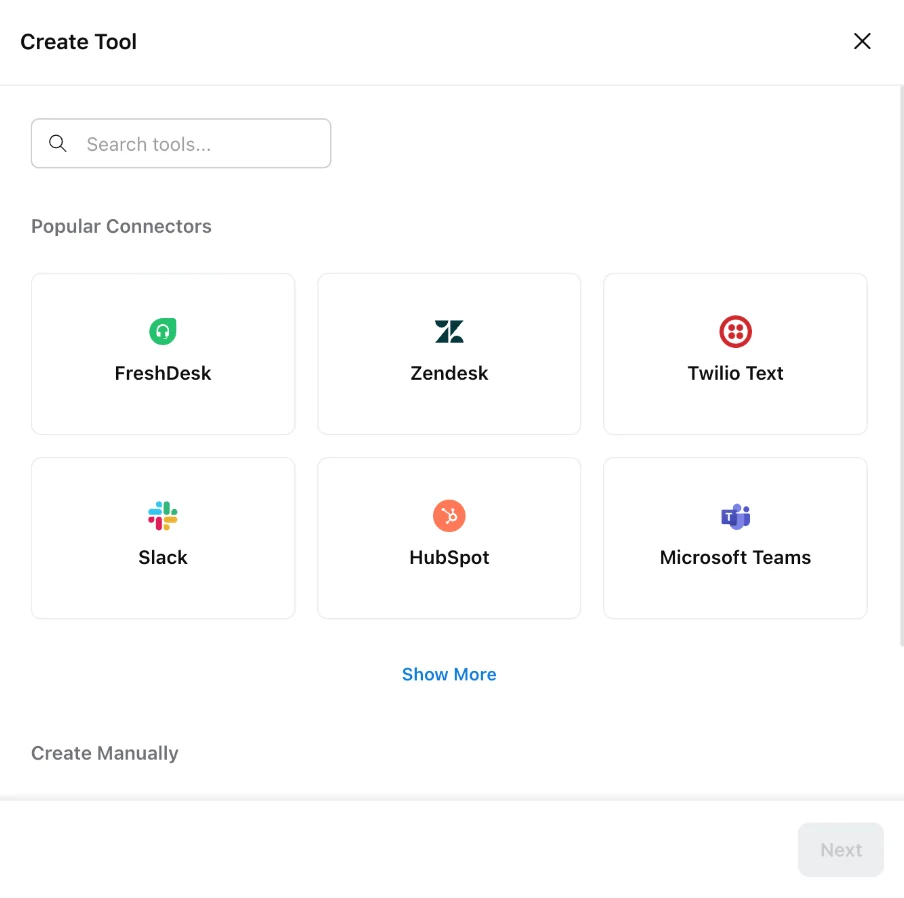
Go to [**Settings → Data & Developer → Tools**](https://app.robylon.ai/settings/tools) and click **Create Tool**.
Choose a connector under **Popular Connectors**, or under **Create Manually** choose **APIs** or **Forms**. Click **Next**.
 For **APIs**, select one of your saved APIs. For a connector, connect the account you want the tool to use.
Enter the **Tool Name** and **LLM Description**, describe each of the **Tool Inputs**, add any **Capture Response** fields, and set the timeout and **Retry & Timeout** settings. Then save the tool.
Open an AI agent, click **Add Tool** under **Tools Available**, and pick the tool. Then publish the agent.
Saving a tool updates it straight away for every agent that already uses it. There is no separate publish step for the tool itself.
## Connectors that need no API
**Popular Connectors** in **Create Tool** are FreshDesk, Zendesk, Twilio Text, Slack, HubSpot and Microsoft Teams, plus Google Sheets under **Show More**. When you pick one, Robylon asks you to connect an account ("Connect an account to use with this tool") and then lets you pick one of that app's actions under **Select Action Template**.
## Tool types
The **Tool Type** filter in the Tools list groups tools by where they come from:
* **Manual tools:** built from your APIs or [forms](https://www.robylon.ai/docs/chatbot/forms).
* **Connector tools:** built from a connector (FreshDesk, Zendesk, Twilio Text, Slack, HubSpot, Microsoft Teams or Google Sheets), listed under **MCP Server**.
* **Workflow step tools:** created from a workflow step, so an agent can jump into that part of a workflow. See [step tools](#step-tools). Robylon also creates one automatically for each [sub-agent](https://www.robylon.ai/docs/ai-agents/sub-agents), named `handover_to_...`, which is how the triage agent routes to it.
## Step tools
A step tool turns a block in a workflow into a tool. When an AI agent calls it, the workflow runs from that block onwards, so the agent can hand off to steps you have already built, for example creating a return.
Create it from the workflow, not from the Tools page:
Open the workflow and click the block you want the agent to start from.
In the block's details, click the menu at the top right and choose **Convert to Tool** ("Convert this step into a tool so the AI Agent can begin automation from this point").
Give the tool a name and a description of when the agent should use it, set its inputs, and click **Save Tool**.
The step tool then appears in the Tools list, and you can add it to an agent under **Tools Available**. To change it, open the same block and edit the **Convert to Tool** form; the Tools list only links you there with **Go to Step**.
## How inputs get their values
Each input takes its value from one of three places:
* **AI agent:** the agent extracts the value from the conversation. If the customer writes "Where is order 12345?", the agent fills `order_id` with `12345`.
* **Constant value:** a fixed value you set, for example a store ID.
* **Global variables:** a [variable](https://www.robylon.ai/docs/data-and-integrations/variables-intents-entities) already set in the conversation, for example the customer's email.
Describe every AI-filled input clearly ("The order number, 6 to 8 digits, without the # sign"), because the agent uses the description to find the right value.