# Install the Robylon Chatbot on a WordPress Site
Add the Robylon chatbot to your WordPress site with a code snippet plugin such as WPCode.
> Source: https://www.robylon.ai/docs/chatbot/install/wordpress
> Section: Chatbot
To add the Robylon chatbot to a WordPress site, copy the chatbot's snippet from Robylon and add it with a code snippet plugin. This guide uses the free WPCode plugin. You need admin access to WordPress.
## How do I copy the chatbot snippet from Robylon?
Go to **Settings → Channels → Chatbot**, click your chatbot, open the **Install** tab, choose **Web → Wordpress**, and copy the snippet. It already contains your Chatbot ID. See [Installation](https://www.robylon.ai/docs/chatbot/installation) for what the snippet does.
## How do I install the WPCode plugin?
If you already have a plugin for adding code to your site, skip to the [next section](#how-do-i-add-the-chatbot-to-my-wordpress-site).
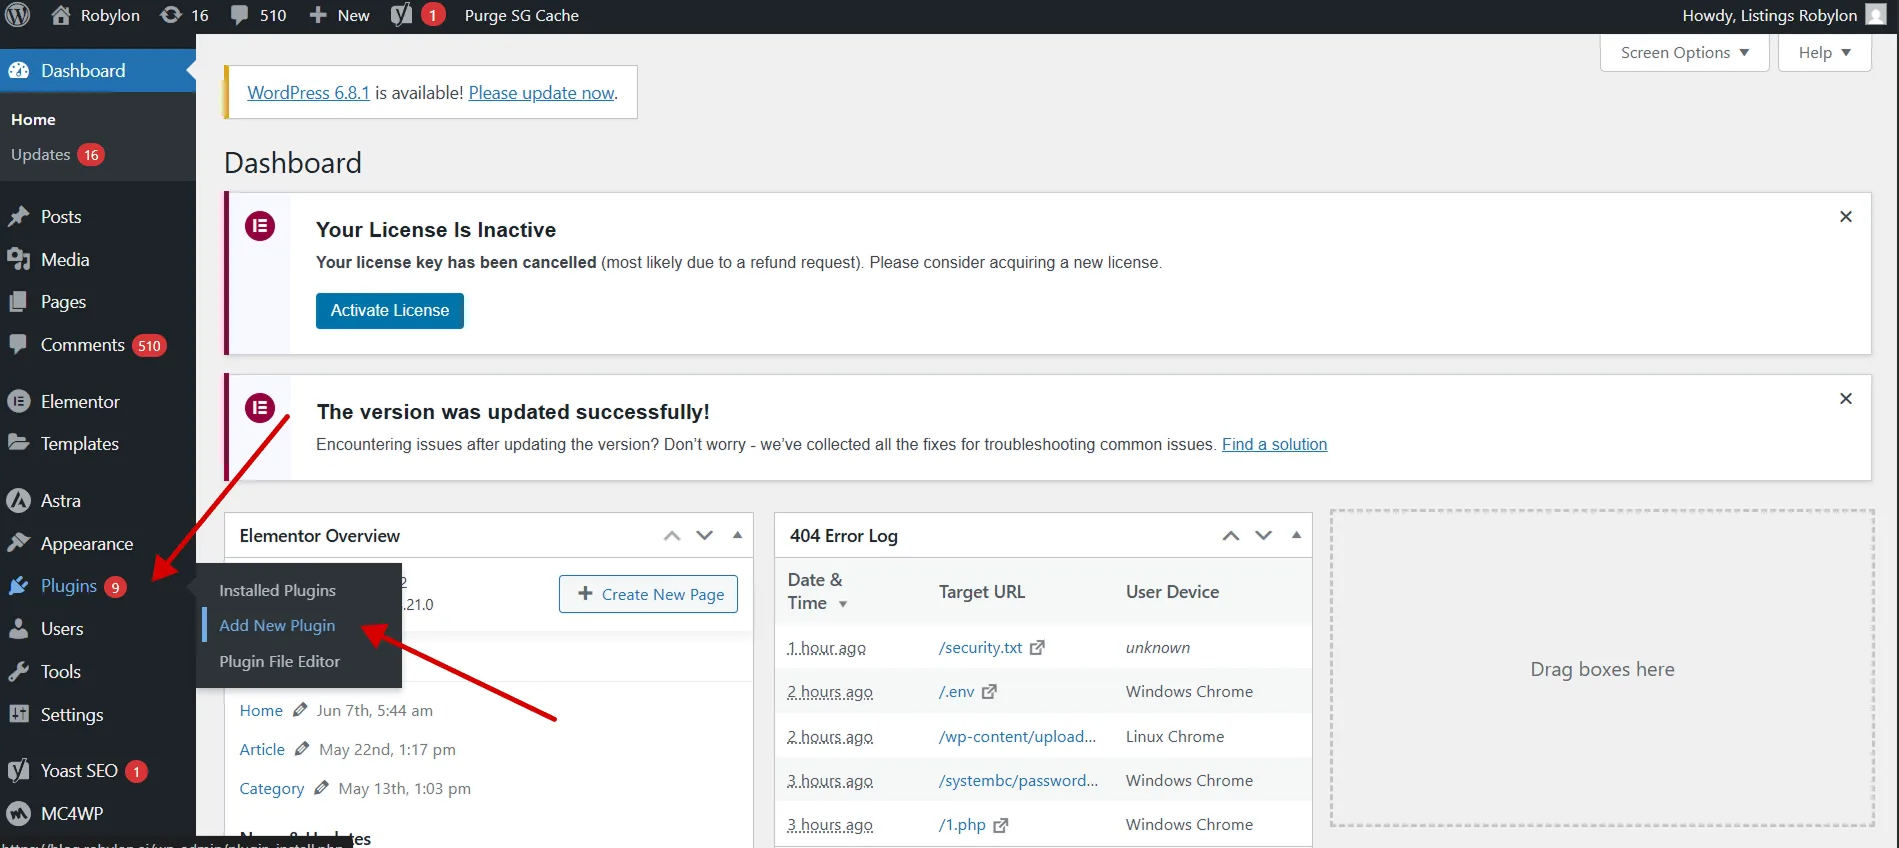
In your WordPress admin, go to **Plugins → Add New Plugin**.
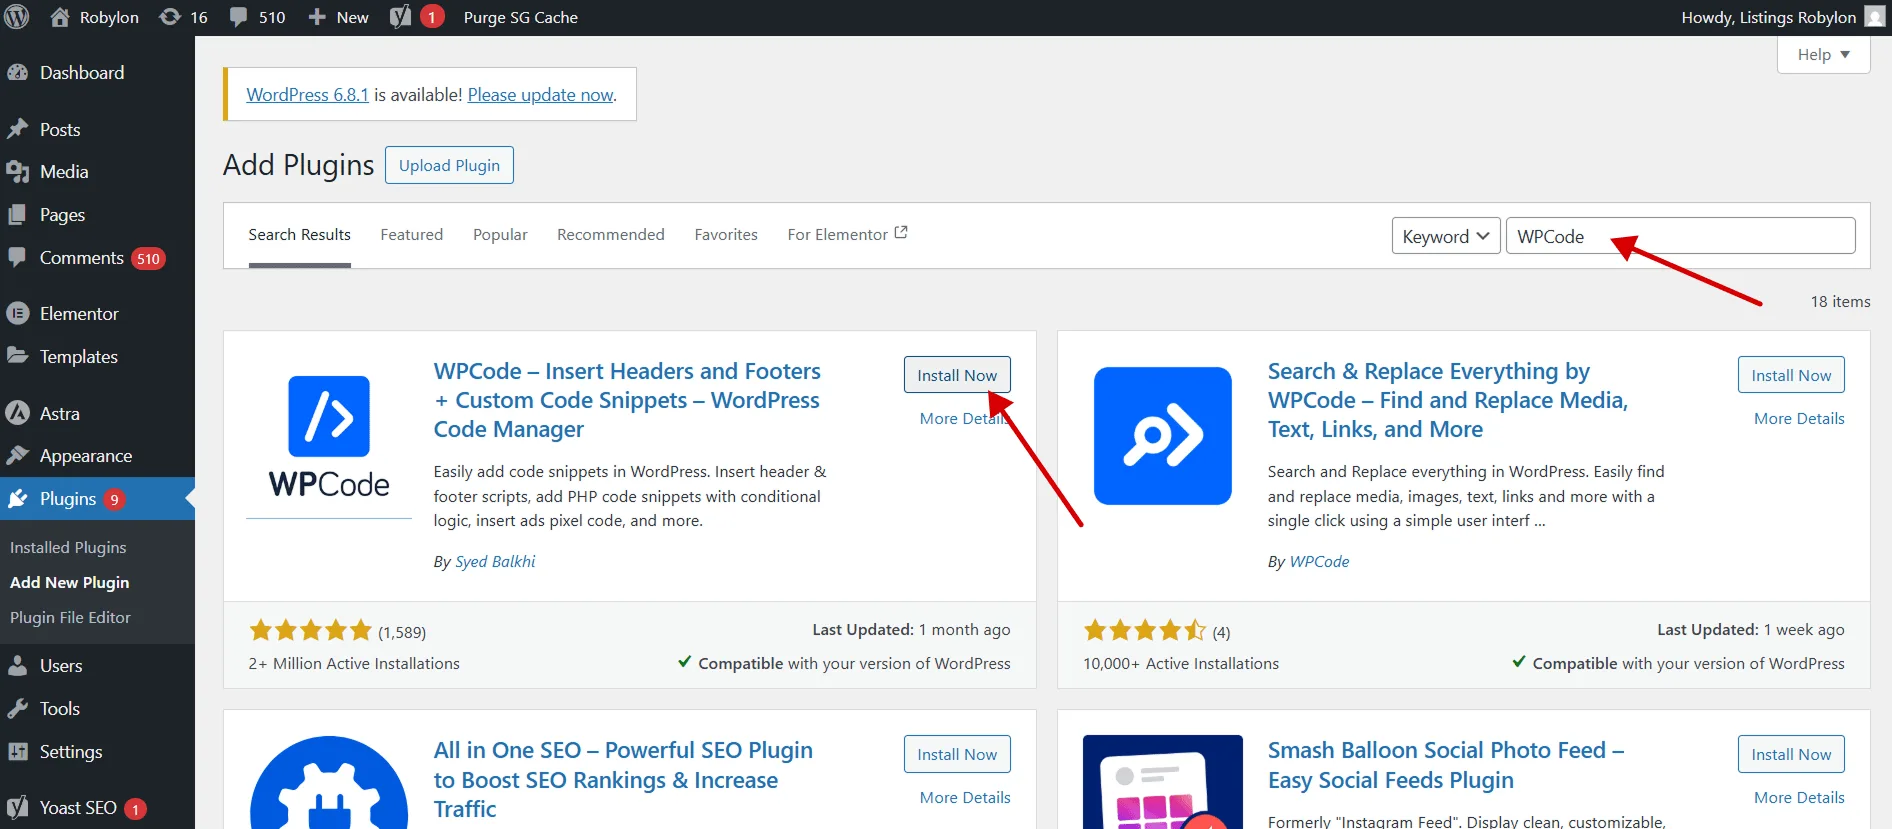
 Search for **WPCode** and click **Install Now**.
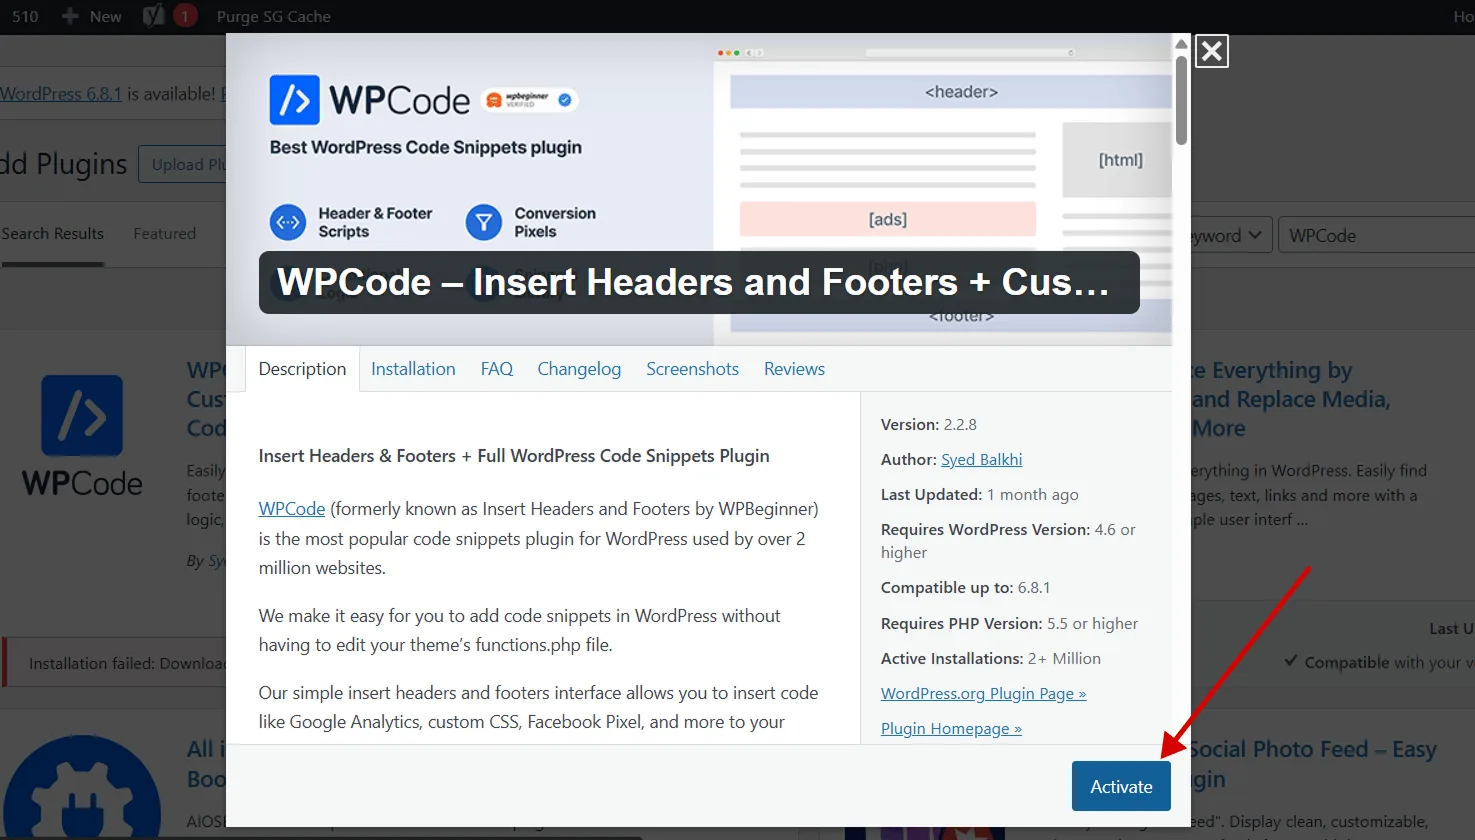
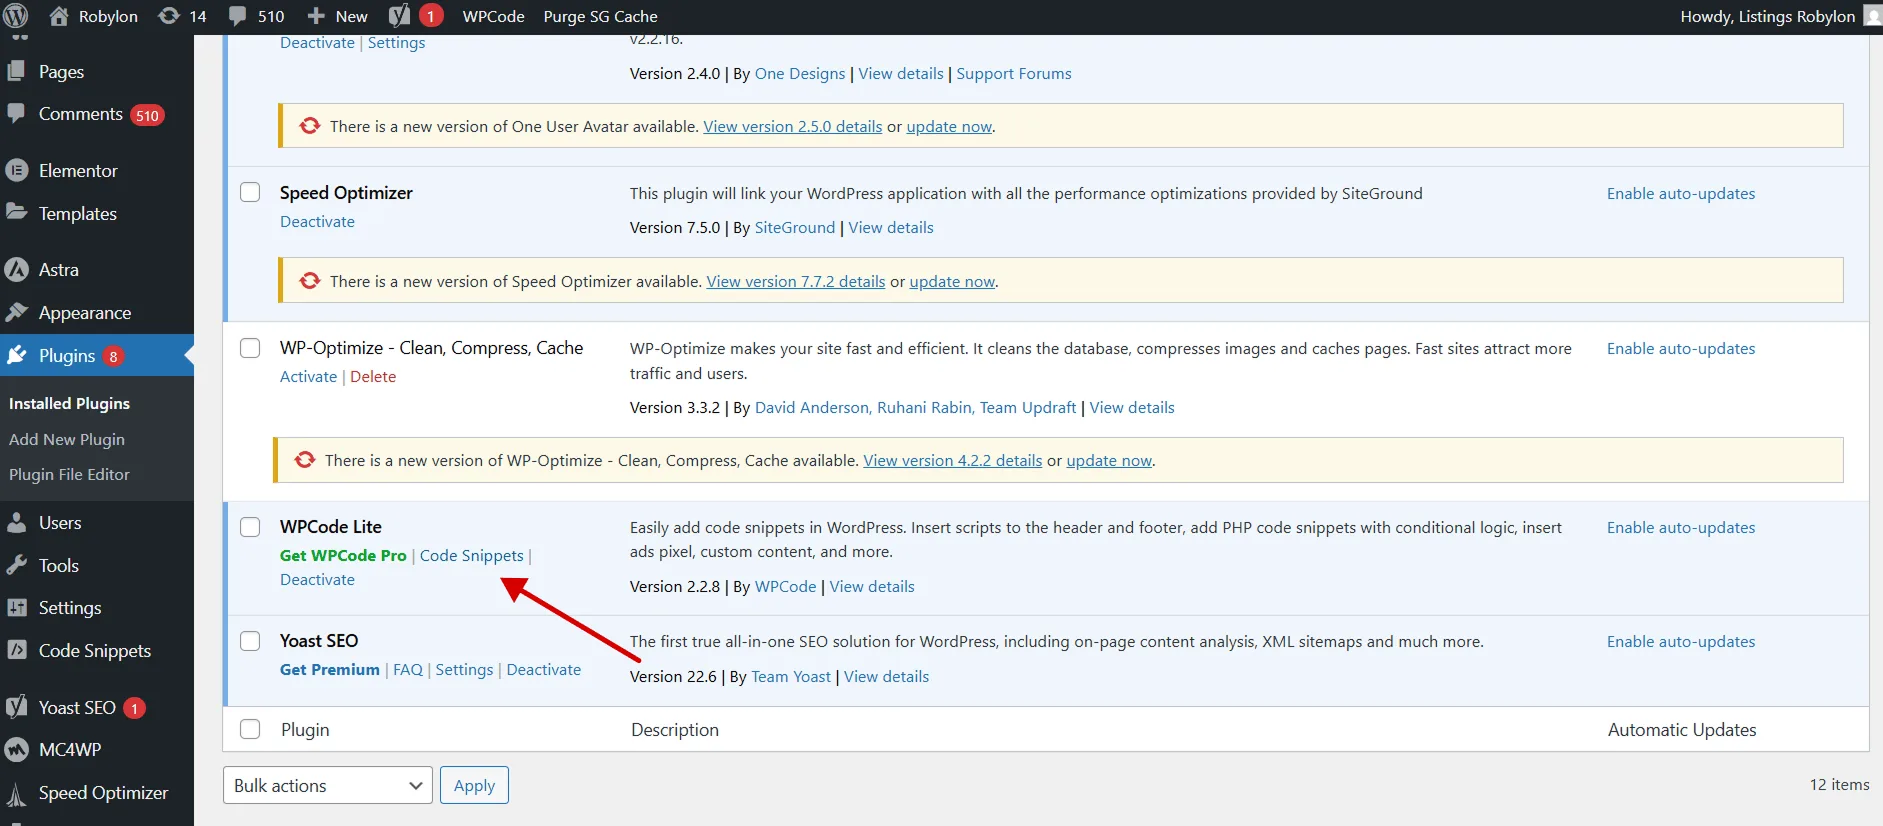
 Click **Activate**. WPCode then appears in **Installed Plugins** and adds a **Code Snippets** menu.
 ## How do I add the chatbot to my WordPress site?
Create a custom snippet with the Robylon code and set it to insert automatically.
In your WordPress admin, click **Code Snippets**.
## How do I add the chatbot to my WordPress site?
Create a custom snippet with the Robylon code and set it to insert automatically.
In your WordPress admin, click **Code Snippets**.
 Click **Add New**, then **+ Add Custom Snippet**.
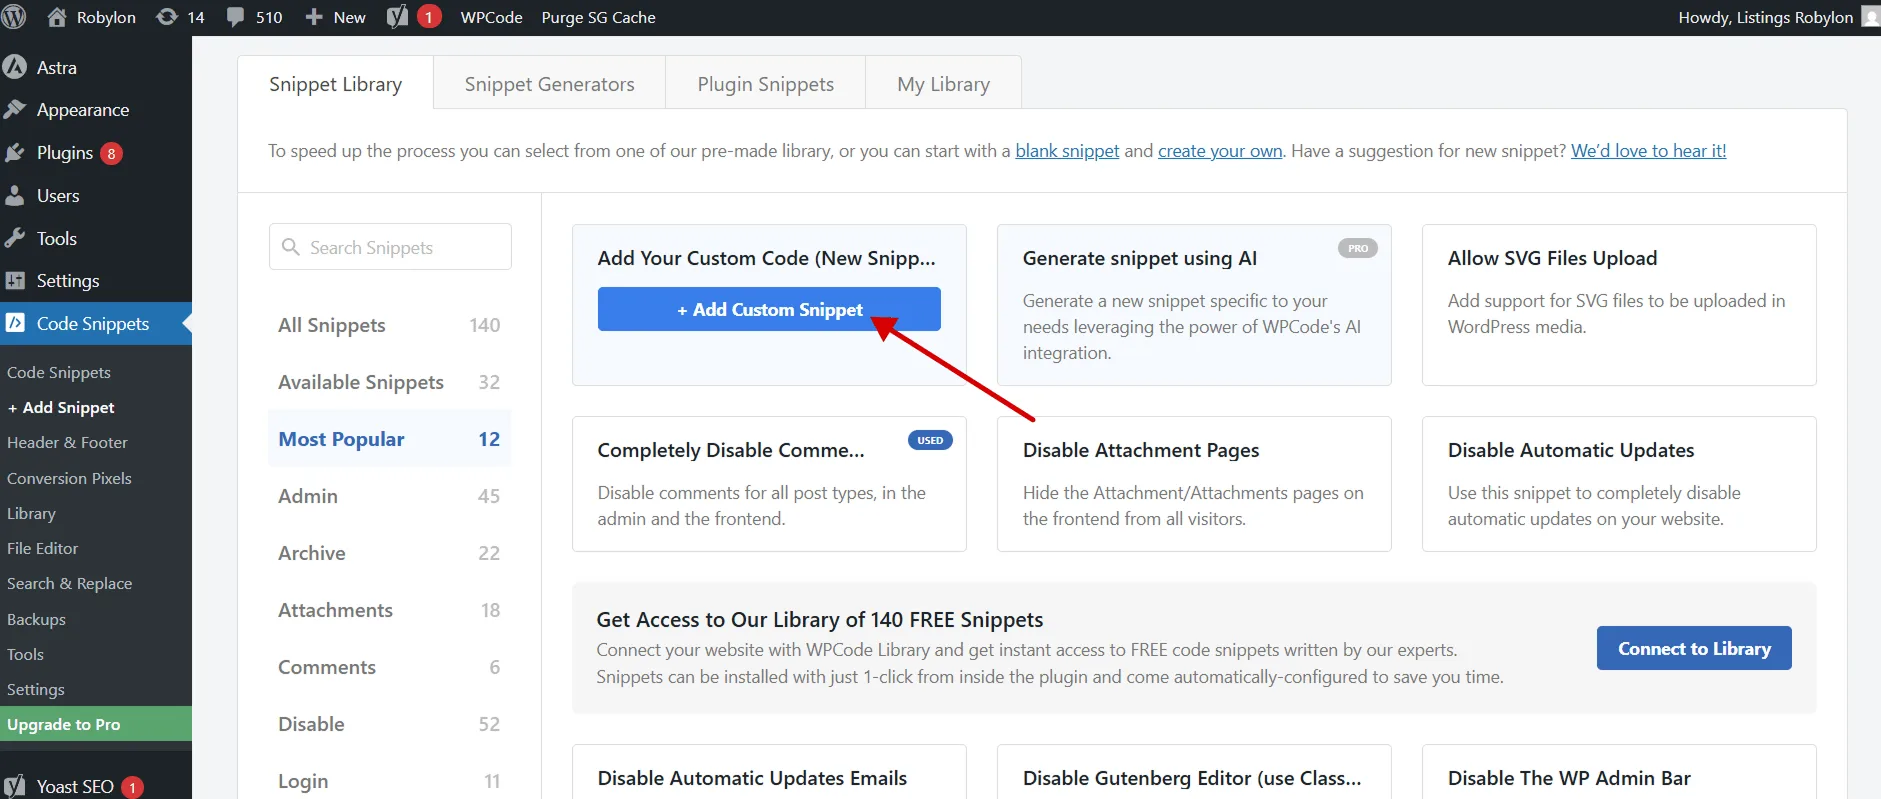 Choose **HTML Snippet**, because the Robylon code includes its own `